Integrating C3 With Cobalt Strike via ExternalC2 And Studying Their Behavior
Cobalt Strike is the industry standard for C2 projects. It provides a post-exploitation agent and channels to emulate long-term embedded actors in networks. Cobalt Strike can use very good surreptitiously channels via many different techniques.
One interesting feature Cobalt Strike provides is called the ExternalC2 link, which allows attackers to lengthen the default HTTP(S)/DNS/SMB C2 communication channels contributed by using additional nodes in the middle of the channels. In this post, I will discuss the use of this feature after Integrating it with the new C3 project by FSecureLabs. Then review the imperceptibility, robustness, throughput, detection, and prevention of this implementation.
INTRODUCTION
C3 stands for custom command control; this tool is made FSecureLABS and was released publicly on September 2nd this year. This is a very new project, and the idea of it is quite fascinating, in a recent blog post made by FSecureLabs about C3 they state, “It is a tool that allows Red Teams to rapidly develop and utilize esoteric command and control channels (C2). It’s a framework that extends another red team tooling (FSecureLabs, 2019).”
IMPORTANCE
Windows has become much more secure over the years with Windows Defenders and the Anti Malware Scan Interface becoming something attackers can no longer ignore. As blue teamers evolve their craft so must red teamers, with the advent of C3, this makes our C2 traffic essentially blend in network traffic as to not raise suspicions. Furthermore, showing that we can integrate C3 with industry-standard red team adversary simulation software such as Cobalt Strike, this means that other red teamers can adapt these tools and techniques into their toolkit. Overall, this is important because this allows red teamers to become less suspicious and appear like genuine traffic; this helps red teamers less likely to get detected.
TOPOLOGY
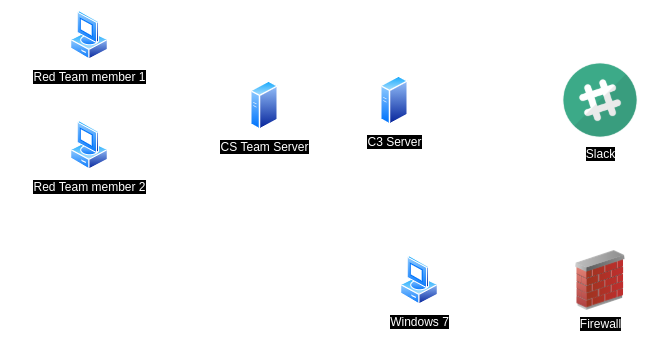
BUILDING & INSTALLING
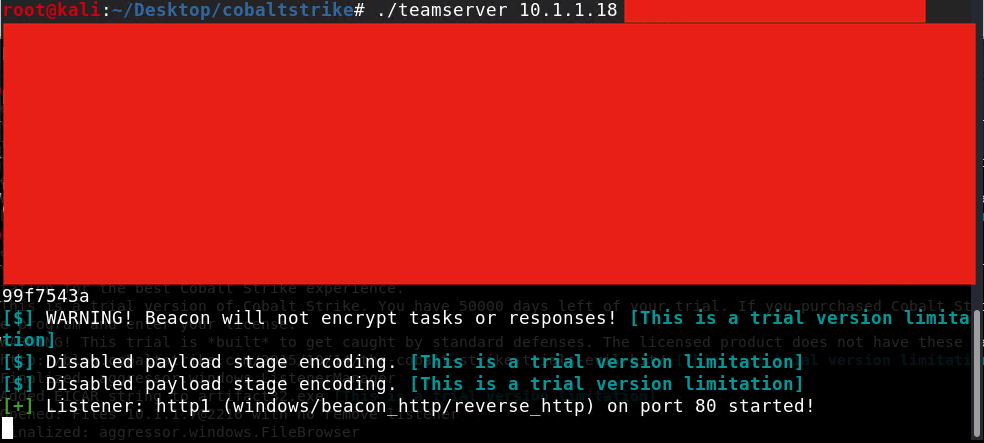
Setting up Cobalt Strike Team server
Setting up CS Team server
$ ./teamserver <IP Addresss> <Team Password>
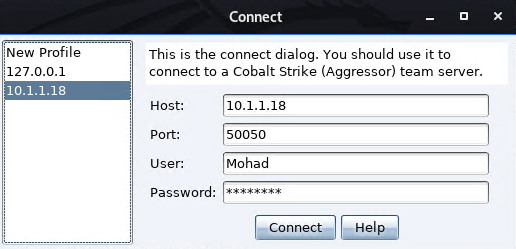
Cobalt Strike Client Test
$ ./CobaltStrike
Enter the team server IP Address, Port, username, and password.
Setting up C3
First, there are a couple of dependencies C3 needs to be installed.
- Dotnet corse 2.2, https://dotnet.microsoft.com/download/dotnet-core/2.2
- Visual C++ Redistributable for Visual Studio 2015, https://www.microsoft.com/en-us/download/confirmation.aspx?id=48145
- C3, https://github.com/FSecureLABS/C3/releases
Start WebController
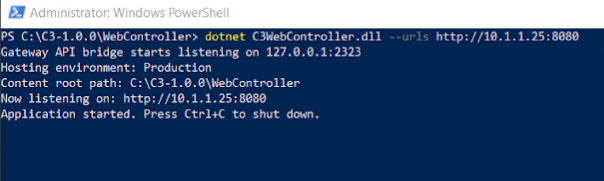
As a result, the WebController will start at port 8080, and you can go to http://- C3 IP -/. In my case, it is http://10.1.1.25:8080/.
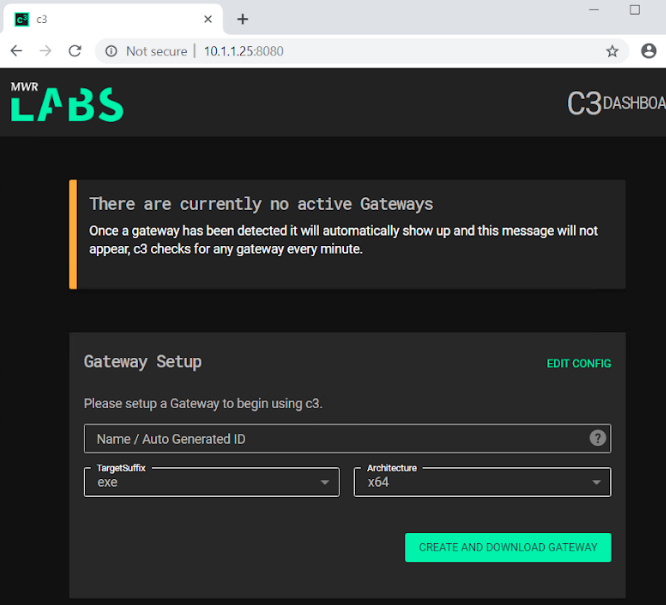
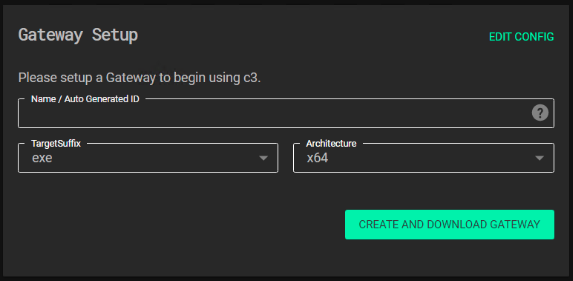
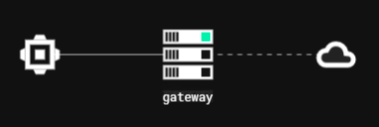
Configure a C3 gateway
Configure a gateway to start using C3 and download the zip file.
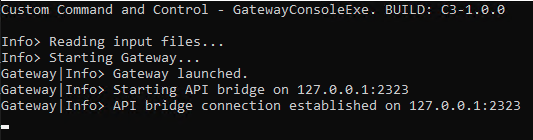
Unzip the file and run GatewayConsoleExe.exe so it connected to the Gateway.
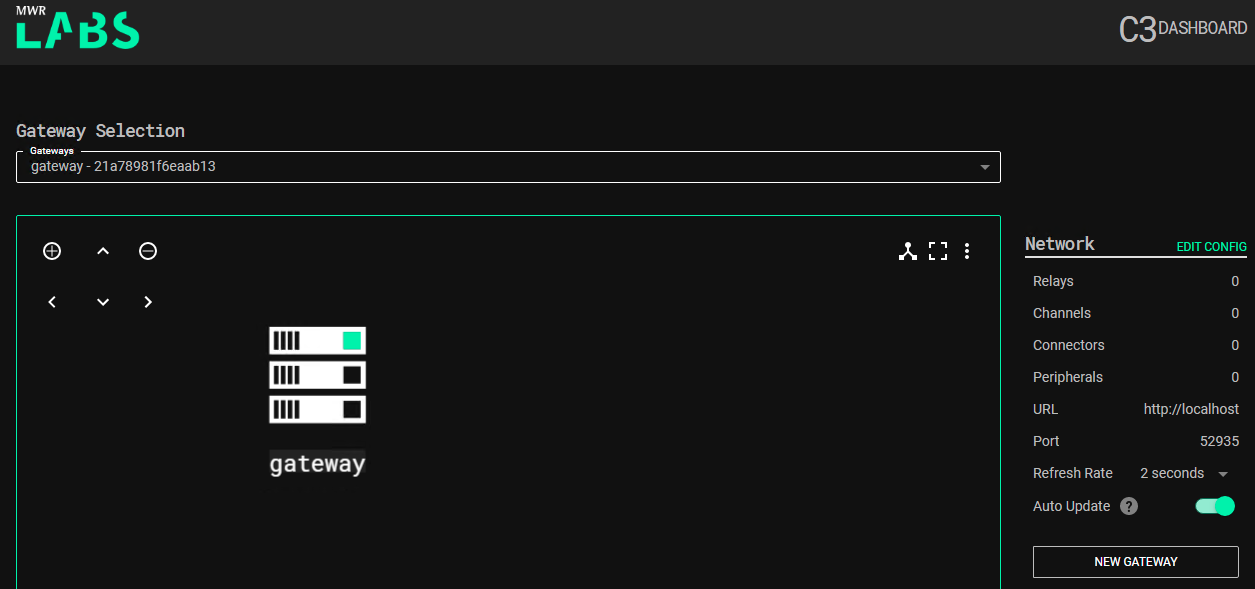
Wait for a minute until it connects. After almost a minute, Refresh the Gateway page. It will show up a page as shown below.
Linking CS with C3
Now to link Gateway to Team Server we need to follow the next steps
Configure the CS side
Create a file with this content
externalc2_start("0.0.0.0", 51002);
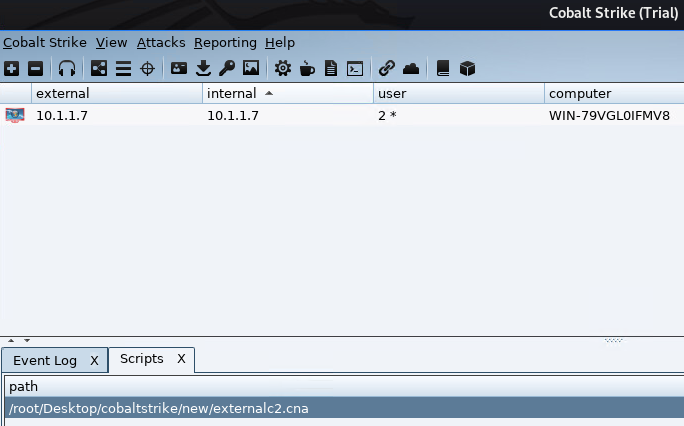
Load it into Cobalt Strike
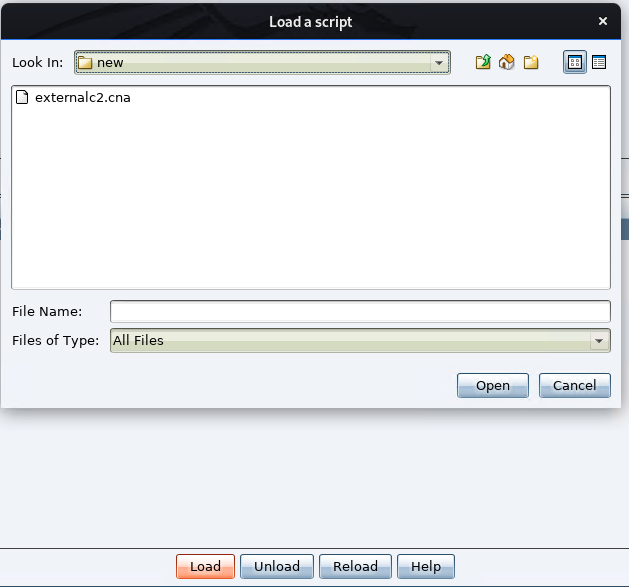
It should be loaded and it should show the script as shown below.
Configure the C3 side
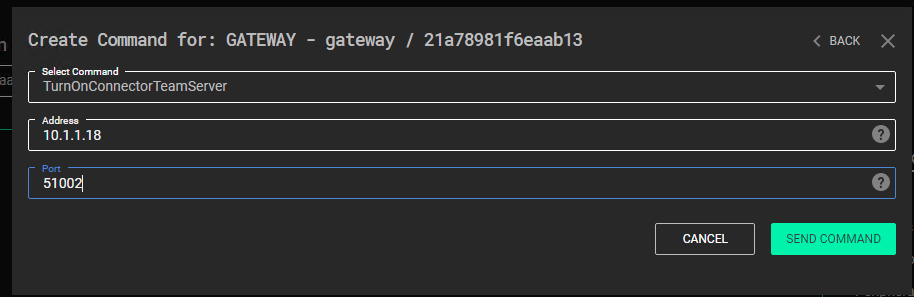
Connect the C3 Gateway to Cobalt Strike.
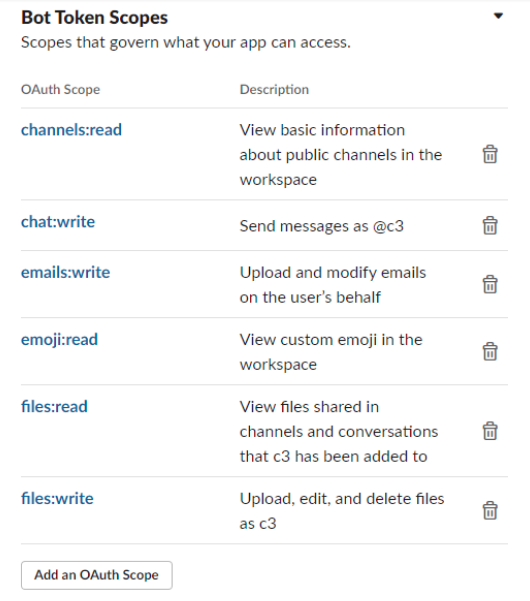
For the channel we use Slack, we created a Slack App in a Slack Workspace. The Bot Permissions we used are shown below.
In the C3 Dashboard, click the Gateway > Command Center > AddChannelSlack and paste Slack token.
As a result, the topology will change as shown
Creating a node relay setup
Next, we need to create a Node Relay for this C2 channel that we will run on a compromised host.
Click on the Slack Channel Interface > Options > New Relay. Then run it on the compromised host.
As a result, the topology will change as shown.

Send Beacons to Cobalt Strike
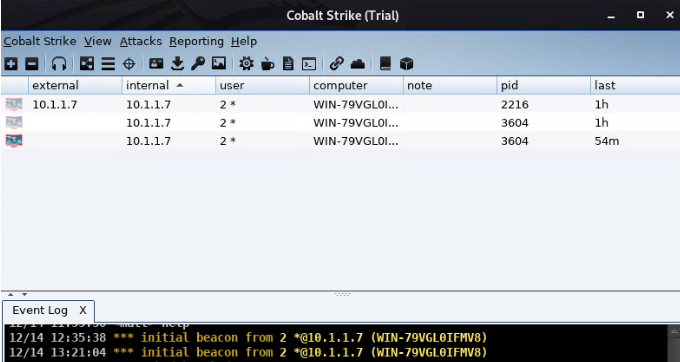
To deploy a CS Beacon, click Command Center > AddPeripheralBeacon > Send Command. Then after waiting for less than a minute. The C3 Dashboard will show a new interface for the new beacon sent.

Cobalt Strike Dashboard will also have will show a new session.
Done!
Network behavior
I captured the traffic on the blue side and noticed that all the traffic is normal since it’s communicating with Slack’s server, and I like that it’s using HTTPS. But I can say that it’s too noisy. a whoami command generates +30 packets, which is a little bit suspicious, especially when I dump hashs; It generates uncountable packets. In a future post, I will try to analyze the captures and identifies the unusual characteristics.
Slack channel behavior
I notice when the C3 sends and receives data. It encodes the messages (maybe enctype, not sure, but the messages end with == so I guess it’s just encoding) from both ends. And when it finishes using the sent messages, it deletes the messages, which is something I liked.
Problems
The main problem in this implementation is the Relay binary/DLL. The implant needs to be loaded and running on the blue team side. Which is by using the default binary or Dll, just running the exe file is easily detectable. And the DLL implant is a better option but still not persistent after rebooting the system; thus, more persistence techniques need to be integrated with the implant to make sure it’s working all the time, otherwise, we lose cobalt strike beacons.
Conclusion
C3 is an amazing project. Very helpful and adds more implants in the blue teamers’ servers that behave differently, thus more ways into their systems, thus, more persistence. I think in future Red Team competitions, I would use it as a kind of last resort implants. Finally, special thanks to @notoriousRebel1 for helping me making this work.
References
- https://github.com/FSecureLABS/C3
- https://labs.f-secure.com/tools/c3/
- https://www.cobaltstrike.com/help-externalc2
- https://0x1.gitlab.io/exploitation-tools/C3/
- https://rastamouse.me/2019/09/mwr-labs-c3-first-look/